Monday, June 9, 2014

Candy Wrapper Inspired Fabric Handle Chain Tutorial

from Facebook....

A few years ago I bought a jelly roll from one of April Cornell's lines and made this handle. It is 20" long and 1-1/2" wide. The colors are ecru, coral and aqua. The fabric is no longer available and I do not have any more. So basically I end up with only one handle which I do love. My problem is I have never been able to come up with an idea or inspiration for a purse to attach to the handle. 


I used a jellyroll. They are 2-1/2" wide and I cut the pieces 7" long. Because I could not fold the fabric I had to iron the fabric instead.

Here we go...

Only cut out the first few pieces as you might have to adjust the length of the fabric. While pressing the fabric can stretch. Better to be safe than sorry. Two links will be approximately 1" of handle. There fore a 20" handle could be 40 links.

Step by Step: Make Bias Tape
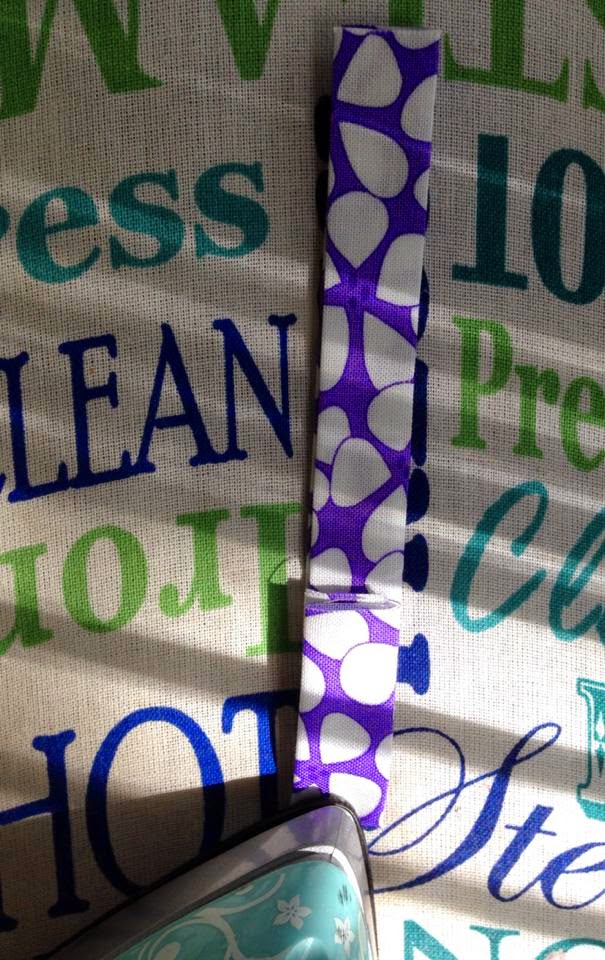
Your fabric should be 2-1/2" x 7". I suggest spray starch for every step. First fold in 1/2 the long way and iron


Open the strip and fold just shy of the center press line and spray and press.


Repeat for the other side

Fold at the center and give it a good press


Now fold in half again to make a new center, and yes spray before ironing


Open it up, bring the end shy of the center again and press


Spin it around and repeat, spray it before ironing. It probably feels like card board but you need the starch for strength and for it to hold up afterwards.


Fold it up, and a final press, one link done, with this size if fabric, 
two links equals approx 1" of handle


You have one link finished. I do not suggest ironing more than three at this point. You want to put a couple together first as fabric stretches and your links will probably need adjusting. Mine stretched and I had to take off a 1/2 inch of the length and re-press them.


Creating the links

The light in link 1, the dark link 2. Always make sure the center fold is facing you not the side with all the folds. Slide link one and two together. Look at the pic, I am not sure how to describe. Notice how I went between the folds. This creates the link in the chain.


Pull the fabric thru


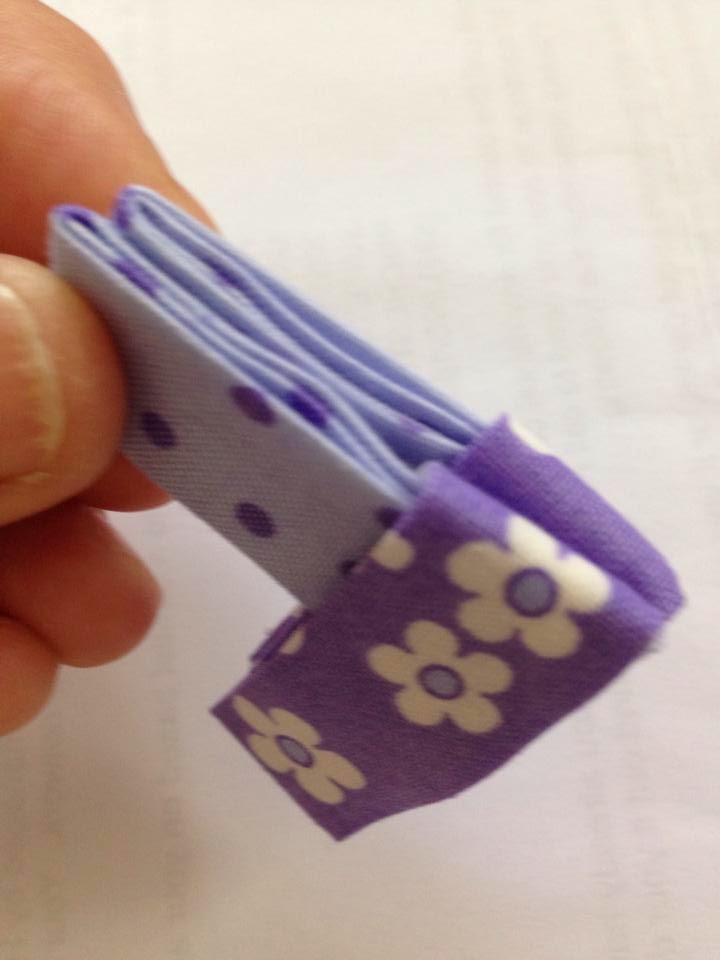
Turn it over, link one is now the point of entry
Now slide link three. Notice the single fold is down and all the layers are up


Because the fabric stretched when I pressed it . I would stop at this point and adjust my length. As you know all fabric reacts differently. So I only make 3 links before continuing. I would start by shortening my link by 1/2" and repress


Adding the ring at the beginning and end...

Adding the rings to the begging and end is almost the same. I suggest round rings and not square. I think the handle will lay nicer and look better. I have to show you with square because that is all I have right now. First cut one of the links a little more than 1/2, just above the center seam


Press into a mini version


Slide the ring on to the center seam


Fold and Hold


Now slide a link thru. Keep a firm hold it will want to fall apart


Stitch the 1/2 link closed. I prefer to use button or upholstery thread as it is much stronger than regular thread.


This is how the finished link will look.


Please share your pictures with me if you should decide to make one or more.
I would love to see your completed projects and I need an idea for the body of my bag.

Yes, you have my permission to make and sell hundreds of handles if you want.

Enjoy and may the Sewing Gods be with you!
Maureen

Friday, February 28, 2014

Pillows, Pillows and more Pillows

My throw pillows are finished !! I had enough extra tablecloth fabric from the curtains and other pillows to make one pillow using three of the fabrics too. I thought I would add a few fake fur pillows but decided not to go with the idea. Maybe next fall I will change my mind. However seven pillows later and my living room now looks and feels warm, inviting and comfortable. Next step will be finding a picture for the wall over the love seat.


Monday, February 24, 2014

A valance for the kitchen window

I love the box seat window in my kitchen but it was in desperate need of color. So I continued sewing using the Cynthia Rowley tablecloth fabric that was leftover from my living room tab top drapes. I made the decision to not use drapes in the kitchen. If mounted on the outside of the box they would hang too close to the kitchen table and I have a very young grandson. Hanging drapes inside the box portion of the window would cut off the natural sunlight that comes in. I live in a suburb of Rochester, NY. Sunlight is very limited during the winter months. So the choice I made was to design and create a valance using mini blinds for privacy and keeping the cottage/coastal style in my creation.

Here is the before and after….


...time to make the pillows...


Sunday, February 23, 2014

From Tablecloth to Tab Top Drapes

I recently moved in to a very neutral townhouse with off white walls and very white cupboards. Actually the whole house is very plain and lacking color. It is a rental property so I will have to make it my own by adding the color elsewhere since painting is not an option. 

I have never been a person who would leave my windows bare. I spent some time looking for drapes and really not sure why when I could easily have made what I wanted. However I was not able to afford the decorator fabric since it was $25 a yard. I would need at least 8 yards. Two windows would have cost me $200 for a rental property, not. While looking for a tablecloth for my kitchen table the inspiration for my new treatments was right in front of me. I grabbed two tablecloths and the fun began. My total investment with sales tax was $40. I now had enough fabric for the living room and kitchen window as well as some leftovers for a throw pillow.

Today's project was for window #1 in my living room. Since I love the look of cottage/coastal style I decided to make tab top curtains. Thank you Cynthia Rowley for having the inspiration to design a print that I feel is just for me. 


 the kitchen is next...


Tuesday, January 14, 2014

Diaper Bag for Sharon's new grand-daughter, Liliana

One of the best things about Facebook is that it reunites you with old friends.  When my friend, Sharon (from high school) found out that she was going to be a grandma in 2014, she contacted me and asked if I would sew a diaper bag. Of course I was thrilled and said yes. A few months later she again contacted me and told me the baby would be a girl. It did take some searching and lots of emails back and forth but I finally found fabrics that would match the nursery and shower theme. The next step was to design and create a pattern for the "perfect" diaper bag. Many hours later, I think it was about 18 hours, this is my design and finished product. At times I had no idea where I was going with my design until that moment when I was ready to add the next piece from the pile in front of me. I was thrilled with the outcome as was Sharon. The best part of all…two old friends reconnected and got to have lunch with my new grandson, Aiden and my daughter, Karleen when we made the exchange. I am sure there will be many more lunches in our future.


Thursday, January 2, 2014

The Colors of 2014

Did you now that the Pantone Institute chooses the color of the year for fashion? They sure do! If you want to know what colors you will find hanging on the racks this fall, you can find out early. It is not a coincidence when the fashions on the catwalks share the same color pallet. I can't stand when I finally get to go shopping for new clothes, go to the mall and find everything is dark and dreary (as you all know I love color). By knowing the colors in advance I can hang on to that old sweater I was going to donate, since it is now back in style, or plan my sewing in advance.

This is the link to the Pantone Institute's blog. The color of the year and for each fashion season can all be found on this blog. The colors not only pertain to our clothes but they are also for decorating our living spaces from paint to furniture, drapes, appliances, etc.

http://blog.pantone.com